Showing posts with label diy. Show all posts

Monday, January 23, 2012

Before and After: Desk


I spent a long time looking for a great desk that would provide a good amount of storage, have a classic look, and at a decent price. After a few months of searching, I found this piece on craigslist for $35! Full of potential and in a nearby neighborhood. I loved the fact that it needed some work, because then I was able to customize it to be just what I wanted.
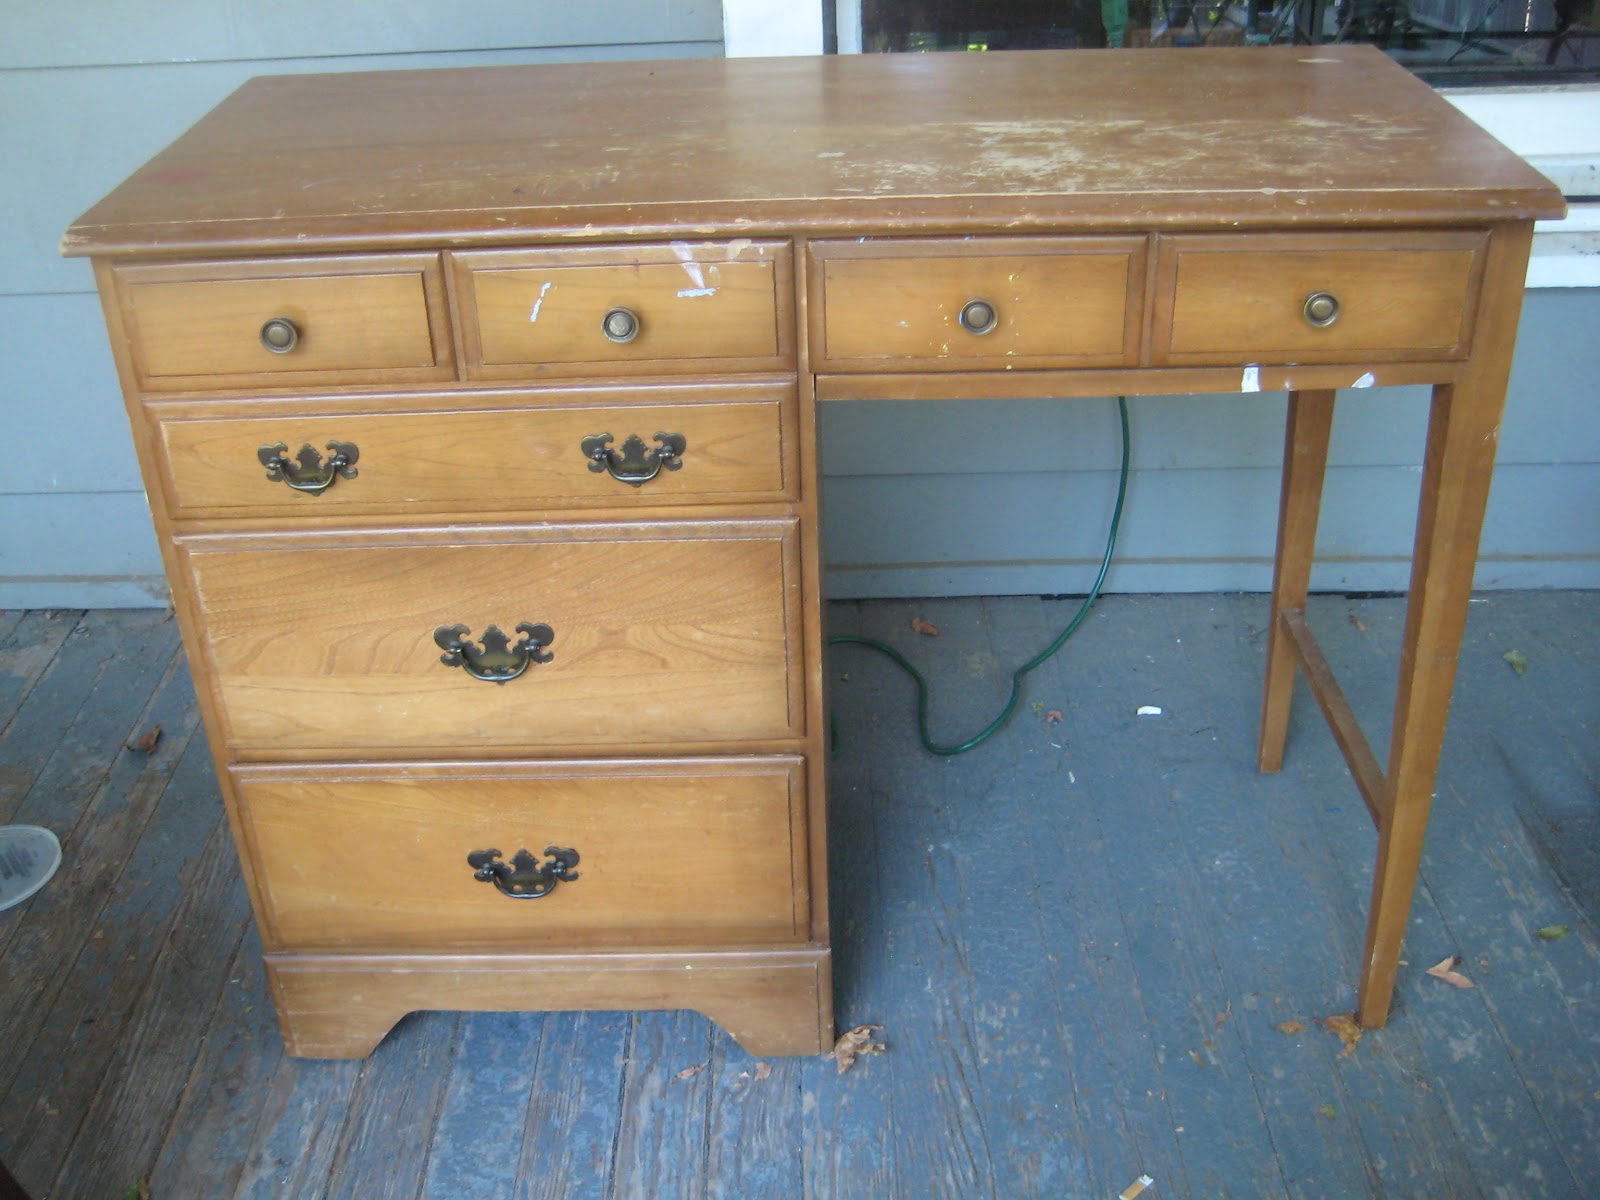

needed some love all over


I started off by sanding down the whole thing. That took the most time, by far. Then I spray painted the entire thing with a glossy white. I took the drawers out and sprayed them a mustard yellow. I was going to look around for blue glass knobs and handles like these ones from Anthropolgie, but didn't feel like spending the time or money.


I ended up spray painting the hardware it came with a deep teal that I already had laying around. I love the way it came out!

Sunday, March 13, 2011

Oh, baby!

For most animals, spring is the time of birth and I certainly have found that to be true with my friends. In February I went to baby showers for my friends Georgina and Dama to celebrate their soon-to-be-born baby boys!

 
George
3 other pregnant ladies at the shower!

Dama
So much blue!
Both showers were so much fun! The only shower I had ever been to before was one that I actually hosted. So I definitely got caught up with these back to back ones.

Georgina's baby decided to come a little early - so less then a week after the shower we got to meet baby Luke!

so handsome!

I wanted to make something for Georgina that was baby related, but not "too" babyish. I decided she could use a new picture frame to display one of the many new pictures of her little one! I went to Michaels and picked up a frame, some small wooden circles, and fun little white sticker letters. Between my coupon, and teacher discount, I spent about $6! I already had appropriately colored paint and wood glue at home.


I used green, blue, and yellow paints and had to do about 3 coats of each. The paint dried really quickly, which was nice, so by the time I finished painting the 4th circle I could go back and paint the first one with another coat. I let them dry overnight to be on the safe side, attached the sticker letters and then attached the circles, with wood glue, to the frame.


I think it turned out really nicely and Georgina really liked it. When I brought it over she actually had a frameless picture sitting on her desk! It was such a simple project and a cheap way to create a customized decoration that is also functional.

Sunday, January 30, 2011

DIY Chalkboard Storage Boxes


I've been wanting cute storage containers for my room for a while now and decided to paint a couple of shoeboxes solid black. Then I was looking at Lemme Make It and Kristin had painted a banner with chalkboard paint. So I figured I could do the same with my shoeboxes. I went down to Lowes and they had a container for $13 (which will last me forever) and so I came home and got to work.
Supplies
I probably had to paint on at least three coats. I would recommend doing your last one (or maybe all three) with a sponge because the paint strokes were very evident on mine. I liked the look but it makes writing on the chalk a little less smooth.
Finished Product
I love them! They live on my bookshelf and look great. I love that I don't need to worry about making new labels if I decide they need to contain something else. Total spent was $13, but my can of paint is still almost full, so I'd say these storage boxes cost less then $1 each!